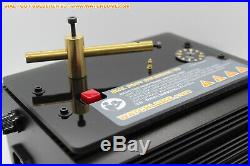
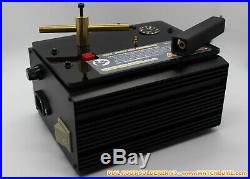
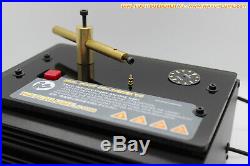
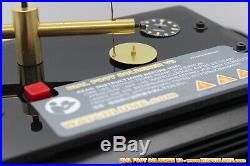
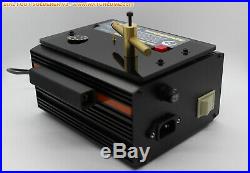
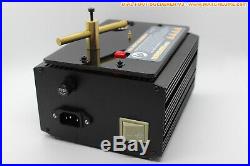
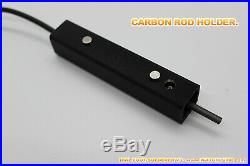
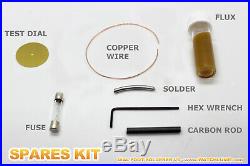

WATCH DIAL FOOT SOLDERING MACHINE VERSION 3. A professional dial soldering machine. Use this machine to replace broken dial feet without damaging the front surface/face of the watch dial. Now in version 3. Several improvements to the design and build have been made. Now in a heavy duty aluminium case. A solid brass arm now holds the new foot allowing for more precise placement. Several other design improvements. Provides a fast, controlled, intense and precise blast of heat that melts solder within seconds. Unlike conventional soldering irons who’s weak dissipated heat can damage watch dial faces. Uses carbon rod based technology to produce a strong, clean soldered joint that will last for many years. It will prove very useful in attaching replacement feet to metal watch dials. These dials are used on all mechanical, digital and analog quartz watches. Dial feet have always been used and should continue to be used in the future for attaching dials to movements. Available as a 240 Volt system or a 110V system for the USA. Includes a spares kit with everything you need to get started. Solder, Flux, Copper wire, Practice/Test dial, Spare carbon rod, Spare fuse. Printed instructions are also included with the machine. Over 200 happy watch dial repairers customers worldwide. Including several in Switzerland. Sent with tracking from. LONDON, ENGLAND (220 VOLTS). RHODE ISLAND USA (110 VOLTS). Not to be confused with lesser quality home made machines. These machines use unsafe wooden boxes and apart from being of lesser quality may prove to be dangerous. Thank you for purchasing this dial foot soldering machine. For the best most accurate results this machine should be used on a well illuminated work bench, a magnifying glass maybe of use. Only three basic materials are required and are included to complete the repair. A – Copper wire: Available in many diameters. B – Rosin core solder: 60% Tin 40% Lead C – Solder paste flux: Rosin paste must be used with the above rosin core solder to achieve a proper strong bond. First, locate on the back of the dial the exact position the new foot is to be attached. If the foot is to be moved mark a new position with a sharp pointed object very lightly. After marking the position clean the area around the mark with a file or similar object to expose a bright, clean surface. Before attaching the new foot determine the diameter of the wire required by inserting into the dial foot hole in the movement. 1 – Remove the nut and gently place the dial face down on to the bolt. Replace the nut, rotate until the mark is in the correct position and secure the dial in place. 2 – Clean the selected copper wire stock with a file or similar. It should be clean and shiny. Insert the wire stock into the clip with the end in firm contact with the dial. Ensure that it is perpendicular to the dial. 3 – Apply a small amount of flux paste to the dial and wire stock at the point of contact. Cut three small pieces of solder and place on the dial in contact with the wire stock. Pay attention to not use too much solder as this will cause issues in fitting the dial flush to the movement. 4 – Plug the machine into a RCD or GFCI outlet. Switch the unit on. Push the little red button down. Bring the edge of the carbon rod into contact with the wire stock, close to the dial without touching the dial. Gently move the carbon rod back and forth across the wire stock. The carbon rod will glow red hot. Almost immediately the solder will flow and will adhere to the wire stock and dial. At this most remove the carbon from the wire. CONTINUED APPLICATION OF HEAT COULD CAUSE DAMAGE TO THE DIAL FINISH! DO NOT LEAVE THE CARBON ROD AGAINST THE THE WIRE FOR MORE THAN A FEW SECONDS. Upon completion of the soldering operation switch off the machine and unplug it. 5 – Allow the solder to cool. Remove the clip and unscrew the bolt. Hold the dial in your hand and cut the wire stock to length, leaving the correct amount to allow fixing to the movement. 6 – We strongly recommend practicing using a few old dials or pieces of sheet brass. This will allow you to become familiar with the machine and it’s operation. With practice you will be able to produce clean, strong joints. The item “WATCH DIAL FOOT SOLDERING MACHINE SOLDER WATCH DIAL FEET REPAIR WATCH DIALS” is in sale since Wednesday, April 8, 2015. This item is in the category “Jewellery & Watches\Watches, Parts & Accessories\Parts, Tools & Guides\Parts\Other Watch Parts”. The seller is “watchlumecom” and is located in London, London. This item can be shipped worldwide.
- Product Type: DIAL SOLDERING MACHINE
- Colour: Black
- MPN: WL-WDSM-220V-UK
- Country/Region of Manufacture: United Kingdom
- Type of Part: Dials
- Brand: Watch Lume

Incoming search terms:
- Dial Feet Soldering Machine
